If you are trying to connect NetSuite to Domo and wondering why it is so difficult, you are not alone. We went through this integration for a US-based company that needed their NetSuite financial data - revenue, expenses, EBITDA - flowing into the executive dashboards we had already built in Domo.
This article covers what actually happened, what the documentation does not tell you, and the workaround we use in production today.
The Two Components of the Domo-NetSuite Connection
The Domo connector for NetSuite is not a simple plug-and-play integration. It has two separate components:
- The Domo bundle
- a SuiteScript package that must be installed inside your NetSuite instance
- The connector running inside Domo that communicates with the bundle
These are two different things, maintained by two different teams, and getting them to talk to each other is where the trouble starts.
Installing the Domo Bundle in NetSuite
The bundle installation cannot be done from Domo. Someone with admin access to your NetSuite instance needs to install it. In our case, our friends at bpm.com helped us get the bundle installed and provided the IDs and credentials that the Domo connector requires.
Unless you have a dedicated NetSuite administrator on staff who has done this before, expect to need outside help. The bundle produces several values you will need later:
- NetSuite Script Bundle ID (in our case, this was
799) - NetSuite Deploy Bundle ID (in our case,
1)
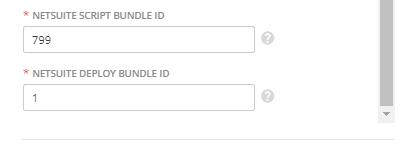
These values are not documented anywhere in Domo's guides. You get them from NetSuite after the bundle is installed.
Choosing the Right Connector in Domo
This is another source of confusion. Domo has multiple NetSuite connectors:
- NetSuite SuiteAnalytics Connect
- uses JDBC, requires SuiteAnalytics API access, pulls data via SQL queries
- NetSuite Connector (the bundle-based one) - uses the Domo bundle, reads from saved searches
- NetSuite JDBC OAuth
- the newer connector Domo now recommends for new setups
The official Domo documentation covers the SuiteAnalytics Connect connector, which works differently from the bundle-based connector. If you are following that guide but using the bundle connector, you will be entering the wrong fields.
We went through a trial-and-error process to figure out which connector to use and which parameters each one expects. The field names overlap but the values are different depending on the connector type.
The Connector Configuration Fields That Nobody Explains Clearly
Whichever connector you end up using, you will need to provide some combination of:
- Token ID and Token Secret
- OAuth tokens generated in NetSuite
- Account ID
- your NetSuite account identifier
- NetSuite Script Bundle ID
- from the installed Domo bundle
- NetSuite Deploy Bundle ID
- from the installed Domo bundle
- Role ID
- this is where things get confusing
The Role ID Is a String, Not a Number
The Role ID field looks like it expects a numeric ID. It does not. It expects a string value like developer or administrator, depending on the role assigned to the user authenticating the connection.
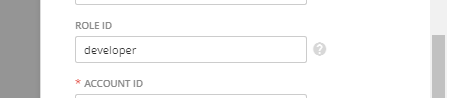
This one detail can save you a solid two days of frustration. We tried numeric role IDs, internal NetSuite role identifiers, and various other values before figuring out it wanted the role name as a plain string.
Saved Searches: What the Connector Actually Reads
An important limitation: the bundle-based Domo connector can only read data from saved searches in NetSuite. It does not query tables directly.
This means:
- Someone on the NetSuite side needs to create saved searches for every dataset you want in Domo
- Each saved search needs to be shared with the user account that Domo authenticates with
- You need to pass the saved search ID to the Domo connector
If you are expecting to write SQL queries against NetSuite tables from Domo (like the SuiteAnalytics Connect connector allows), the bundle connector does not work that way.
The SuiteAnalytics Connect connector does support SQL queries, but it requires a separate API license (SuiteAnalytics) and has its own setup complexity, including recent permission changes that Domo documents here:
Recent changes in the NetSuite environment may cause errors when using the SuiteAnalytics connector with non-Admin NetSuite credentials. To resolve these errors, you can assign the NetSuite user an Admin-level role, or use the NetSuite JDBC OAuth connector.
The Data Sync Bug That Will Cost You Days
After we got the connector working, built the dashboards, and thought we were done, we ran into something worse: not all transactions were showing up in Domo.
At every sync, different transactions were missing. We checked the saved searches in NetSuite - all transactions were there. We checked the Domo datasets - random entries were absent. And the missing entries changed with each run. One sync would miss invoice #1042, the next would include it but miss #1089.
After extensive troubleshooting, we concluded this is a known bug in NetSuite's data sync behavior with external connectors. As of the time of this writing, it remains unresolved.
When your finance team is using these dashboards for month-end reporting and executive reviews, random missing transactions is not acceptable.
Our Production Workaround: Semi-Automated Export
We replaced the real-time connector with a semi-automated process that guarantees data accuracy:
- Month-end close
- the accounting team closes the month in NetSuite as usual
- Manual export
- we export the saved searches of interest from NetSuite as CSV files
- Upload to Dropbox
- the CSV files go into a designated Dropbox folder
- Python processing
- a Python script picks up the files, validates them, and writes the data into a MySQL database using primary keys to ensure unique identification of each transaction
- Domo reads from MySQL
- Domo pulls data from the MySQL database instead of NetSuite directly
This approach trades real-time updates for data accuracy. For financial reporting, where the numbers need to be exact, this tradeoff makes sense. The finance team exports once per month after close, and the dashboards update within minutes.
The primary key constraint in MySQL catches any duplicates that the NetSuite connector was silently creating, and the deterministic export ensures no transactions go missing.
What We Would Do Differently Today
If we were setting this up from scratch today, we would:
- Skip the bundle connector entirely and evaluate the NetSuite JDBC OAuth connector first, which Domo now recommends
- Budget 5-10 hours for the integration (Domo's own estimate), but plan for 15-20 if you have not done it before
- Get a NetSuite admin involved from day one
- this is not something the Domo admin can do alone
- Test data completeness immediately with a known set of transactions before building dashboards on top
Need Help Connecting NetSuite to Domo?
We have been through this integration and built the workarounds. If your finance team needs NetSuite data in Domo, Power BI, or Tableau and you do not want to spend weeks figuring out the connector, reach out to us.
You can also read our broader guide on BI tools for financial reporting and our case study on building an integrated finance reporting system with Domo.